

1) Start with Budget and Permits. Establish your overall budget first, then research backyard permits immediately. They’re required six months ahead.
2) Lock in Major Vendors. Book your tent, caterer, and photographer early to secure availability and better pricing.
3) Plan Layout and Guest Flow. Map distinct zones for parking, ceremony, dining, and restrooms to prevent bottlenecks.
4) Assign Roles and Track Progress. Delegate specific tasks to trusted people and use a centralized planning tool like Trello.
5) Prepare for Weather and Neighbors. Secure weather protection through tent rental and notify neighbors about noise and parking. These foundational steps set you up for success; the details become manageable once you’ve tackled the big decisions.
Start With Budget and Backyard Permits

How can you pull off a backyard wedding without financial stress or legal headaches?
1. Establish Your Budget Plan
Determine your overall budget early in the planning process. Decide who contributes money for the celebration. Your budget plan directly influences venue choices, permits, and vendor selections. When you know your spending limits, you’ll make smarter decisions about catering, decorations, and rentals.
Your budget plan directly influences venue choices, permits, and vendor selections for your backyard wedding.
2. Secure Necessary Backyard Permits
Research permits at least six months ahead. You’ll need permits for noise restrictions, temporary structures, and parking arrangements. Contact your local government office to learn specific requirements. Securing backyard permits early prevents last-minute delays and keeps your celebration compliant with neighborhood regulations.
Planning ahead saves money and reduces stress. You’ll feel confident moving forward with your special day.

Suitable for various occasions - WUHUWOO inflatable nightclub is perfect for birthdays, parties, music festivals, weddings, photo booths, corporate events, exhibitions, and holiday parties like Halloween and Christmas. This spacious inflatable club measures 20x16.8x12 feet (approximately 240x201x144 inches), providing ample space for a dozen adults or a group of children to enjoy together, making it an ideal choice for both business and personal use.

【Premium Materials】--The inflatable nightclub is crafted with high-strength 210D Oxford cloth with double-stitching for long-lasting durability. External guy ropes and stakes offer high resilience against 6-8 level gusts for smooth events holding, which is suitable for long-term indoor/outdoor camping.

Secure Tent, Catering, and Essential Rentals

With your budget and permits locked in, you’ll now tackle the biggest moving pieces: your tent, food service, and rental equipment. I’ll help you navigate tent options that protect against weather, catering setups that match your backyard style, and a rental timeline that keeps everything on track. Getting these essentials secured early—ideally 2–4 months before your wedding—prevents last-minute scrambling and gives you confidence in your event’s foundation.
With your budget and permits locked in, you can now focus on the biggest moving pieces: your tent, food service, and rental equipment. I’ll help you navigate tent options that protect against weather, catering setups that match your backyard style, and a rental timeline that keeps everything on track. Securing these essentials early, ideally 2 to 4 months before your wedding, prevents last-minute scrambling and gives you confidence in your event’s foundation.

Cater Like a Pro: Whether you are preparing for a big event or you want to impress your guests with a mouthwatering buffet, the Alpha Living disposable chafing dish buffet set has everything you need to display and keep the food at the perfect temperature, keeping it fresh and full of flavor!
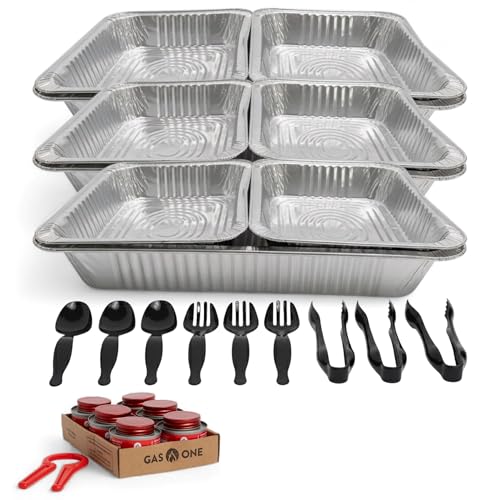
Refill Kit for Chafing Dish Set: Re-use your chafing dish wire racks - our refill kit includes all the tools and accessories to complete your buffet setup! This set includes 3 x sets of utensils, 3 x aluminum half pans, and 6 x cans of high-quality fuel for chafing dish that can last hours! No wire racks included
Complete Buffet Serving Solution: Everything you need for effortless buffet service. This chafing dish set includes the essential serving components plus 4 bonus stainless steel serving tongs, making it easy to serve salads, pasta, meats, and desserts during buffets, weddings, parties, and catering events.
Tent and Weather Protection
A tent is your best defense against unpredictable weather during your backyard wedding. I recommend securing your tent early, at least three months ahead, to guarantee availability. You’ll want indoor-like shelter that protects guests from rain, wind, and intense sun. Having a backup indoor plan ready 24 to 48 hours before the event gives you peace of mind and flexibility.
Creating Comfort Inside Your Tent
I’ll help you design a welcoming space. String lights, canopies, and battery-operated candles create ambiance while keeping guests comfortable. Add generator-powered climate control for temperature regulation. This approach protects your investment while ensuring everyone feels welcomed and cared for throughout your celebration.
| Protection Need | Solution | Benefit |
|---|---|---|
| Rain | Quality tent | Guest safety |
| Temperature | Generator AC | Comfort |
| Lighting | String lights | Ambiance |

Please note: This product offers a variety of customization styles and accessories. The prices listed are not final. For more details or inquiries, please leave a message before purchase or contact me via WhatsApp: +86 13837135279. We'd love to help.

Please note: This product offers a variety of customization styles and accessories. The prices listed are not final. For more details or inquiries, please leave a message before purchase or contact me via WhatsApp: +86 13837135279. We'd love to help.

Please note: This product offers a variety of customization styles and accessories. The prices listed are not final. For more details or inquiries, please leave a message before purchase or contact me via WhatsApp: +86 13837135279. We'd love to help.
Catering and Kitchen Logistics
Catering and Kitchen Logistics
Since you’ve got your tent sorted, it’s time to tackle food, drinks, and the logistics that make outdoor catering work.
1. Book Your Caterer Early
Secure your caterer now. You’ll want menu options locked in, portion sizes confirmed, and delivery timing aligned with your schedule. Schedule a tasting to finalize dishes and confirm they meet all dietary needs.
2. Plan Your Guest Flow
Design a clear pathway from arrival through seating to buffet stations. This reduces bottlenecks and keeps service smooth. Label all ingredients so guests with dietary restrictions can navigate easily.
3. Coordinate Essential Utilities
Confirm water access and adequate power for catering equipment, lighting, and music. If your home utilities fall short, rent a generator. This prevents service delays and keeps everyone comfortable throughout the event.
Rental Inventory and Delivery
How much infrastructure does your backyard actually need? You’ll want tents, tables, chairs, restrooms, and generators. Planning ahead saves money and stress.
1. Create Your Rental Inventory
List everything you need. Account for guest count when sizing portable restrooms: one unit per 50 guests for events under 4 hours, or one per 35 guests for longer celebrations. This prevents uncomfortable situations and reduces waste.
2. Schedule Delivery Windows
Contact rental companies early. Coordinate delivery before guests arrive and pickup after the event. Allow 24 to 48 hours for weather-related changes. This flexibility protects your investment.
3. Plan Power and Setup
Determine generator needs for lighting and catering equipment. Quiet inverter generators work best near homes. Create a detailed delivery map showing vendor contacts, setup locations, and access routes. Clear communication minimizes delays and miscommunication on your wedding day.
Plan Your Backyard Layout and Guest Flow

Where’ll your guests go once they arrive? I create distinct zones for ceremony, cocktail, and reception to guide movement and reduce congestion. This space layout prevents bottlenecks and keeps everyone comfortable.
I map the entire guest flow: parking to entry, seating, dining, and restrooms. I place signage and staff at key transition points. I arrange flexible seating with rounds or long banquet tables, along with a dedicated dance area that doesn’t block service routes.
| Zone | Purpose |
|---|---|
| Ceremony | Main event space |
| Cocktail | Mingling area |
| Reception | Dining and dancing |
| Restrooms | Essential facilities |
| Parking | Guest arrival |
I conduct walk-throughs to test traffic patterns. Pathways accommodate strollers and mobility devices. Temporary lighting and weather-ready canopies define areas while maintaining ambiance throughout the celebration.

Wedding Outdoor Decoration: the wedding yard signs set features the meaningfully beautiful Christian bible verse - Corinthians 13, projecting the values of love and patience; With the script [Love is patient, Love is kind] inscribed on the sign, these wedding aisle signs inspire and promote the virtue and beauty of love among attendees

Wedding Decoration: you will receive 8 pcs wood wedding aisle signs, the size approximately 11.8 x 7.9 x 0.6 inches/ 30 x 20 x 1.4 cm, the weight of a single product is approximately 428g, which are the nice addition to your outdoor or rustic themed wedding ceremony; Note: these aisle signs do not come with stand holder, you can prepare a 15-20cm/ 6.9-7.87in wide iron or wooden stand for decoration depending on your style

Classic Wedding Theme Design: you will receive 10 wooden wedding aisle signs, approximately 15.74 x 11.81 inches / 40 x 30 cm; Each sign is printed with a meaningful and beautiful christian bible verse, such as [Love is patient] and [Love always protects], adding unforgettable memories to your wedding
Prepare for Weather, Neighbors, and Logistics

What happens if it rains on your wedding day? You’ll need a backup plan. Confirm tent options and indoor alternatives 24 to 48 hours before your event. Map out decision timelines so you’re not scrambling last-minute. This protects your guest count and keeps everyone comfortable.
2. Utilities and Power Assessment
Conduct a power assessment for lighting, catering equipment, and charging stations. Determine if you need a generator. Consider noise levels carefully. This prevents equipment failures during your celebration.
3. Neighbor Communication
Notify neighbors early about noise, parking, and your event duration. Securing permissions minimizes disputes. Good logistics start with good relationships.
4. Water and Catering Access
Coordinate vendor access to kitchen facilities or arrange additional water sources near service areas for catering and cleanup.

Measurement is taken from corner to corner, edges are made slightly curved based on precisely calculated radian, prevent shade sail from sagging in the middle for best appearance and performance.

Durable Water Proof Polyethylene Cover,Rust & Corrosion resistant powder coated steel framework

【𝗠𝗘𝗔𝗦𝗨𝗥𝗘𝗠𝗘𝗡𝗧】: Measurement is taken from corner to corner, crafting slightly curved edges based on precise calculations. This design helps the Shade Sail to be tight and neat after installation, preventing any mid-sagging for optimal appearance and performance. Feel free to contact us for a custom order if you prefer straight edges.
Map Your 6-Month Planning Calendar

I’ll break your six-month timeline into three strategic planning approaches that keep you on track. You’ll batch similar decisions together; for example, securing all venue and catering details in one week means you won’t constantly switch gears. Then I’ll walk you through how to align each vendor’s deadlines with your monthly milestones so nothing falls through the cracks.
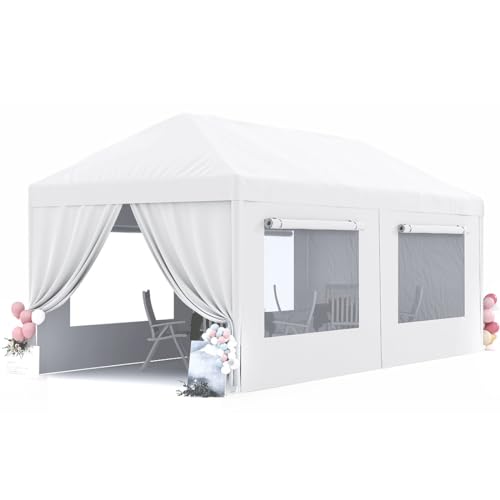
【Mesh Windows Sidewallwith Roll Up Cover】The sidewall have 4 Mesh Windows & Window Covers, which can be used at any time according to the seasonal climate, keep the summer ventilated and warm in winter, create a perfect space for your party at anytime.

【Good Quality Material】This party tent features a top made from premium polyethylene, offering waterproof and sun protection capabilities. It blocks up to 90% of UV rays, ensuring protection under various weather conditions.

【How to Make Your Tent More Stronger?】We strongly recommend using the white duct tape to tape the poles to the plastic connectors after setting to make it more stable and stronger. Please make sure all the connections are tight before use, thanks.
Monthly Milestone Tracker
How do you stay on track when you’re planning a wedding in just six months? A monthly milestone tracker keeps you organized and accountable. Break your planning calendar into clear, actionable steps for each month ahead.
- Month 6: Lock in your venue and set your budget
- Month 5: Finalize your guest list and launch your website
- Month 4: Confirm all vendor details and contracts
- Month 3: Send invitations and schedule menu tastings
Keep deposits and deadlines visible on one master document. This batching approach saves money by preventing rushed decisions and duplicate vendor fees. Protect one to two planning evenings weekly to avoid overwhelm. When you track progress systematically, momentum builds naturally, and confidence grows as you move forward together toward the big day.
Decision Batching By Category
Now that you’ve mapped out your monthly milestones, it’s time to organize your decisions by category.
1. Lock in Major Choices First
Batching decisions by category means grouping similar choices together. Start with venue and permits, which are foundational decisions that activate everything else and build momentum early.
2. Group Vendor Decisions
Next, batch your core vendors: catering, photography, and flowers. Securing these together prevents last-minute scrambling and reduces costs through coordinated timelines.
3. Quick Decisions Count Too
You’ll face smaller choices: color schemes, invitation wording, music playlists. If a decision takes under ten minutes, decide immediately and move forward.
4. Keep Information Visible
Post deposits, deadlines, and vendor contacts where you’ll see them weekly. This visibility maintains your planning cadence and prevents forgotten details that derail timelines.
Vendor Timeline Alignment
When should you lock in your vendors? Securing your backyard wedding vendors at the six-month mark creates your planning backbone. This timing gives you flexibility while keeping costs reasonable.
Here’s how I align my vendor timeline:
- Month 6: Book photographer, florist, and entertainment first. These set your wedding’s tone and have limited availability.
- Month 5: Confirm catering and rentals while securing backup options if needed.
- Month 4: Lock in final vendor details and deposit deadlines on your shared calendar.
- Month 3-1: Handle minor vendor confirmations and contingency planning.
This vendor timeline alignment prevents last-minute scrambling and reduces stress. You’ll feel confident knowing your core team is in place while you tackle smaller details.
Assign Roles and Pick Your Planning Tools

1. Assign Specific Tasks
Give each helper one outcome-based responsibility. Your mom tracks RSVPs. Your best friend gathers vendor quotes. Clear roles prevent duplicated effort and wasted resources.
Clear roles for helpers—one person tracks RSVPs, another gathers quotes—prevent duplicated effort and wasted resources.
2. Choose Your Planning Hub
Pick one digital system: Trello, Notion, or Google Calendar. Track budgets, timelines, contracts, and guest responses in this centralized location. This approach saves money by preventing duplicate vendor contacts and duplicate orders.
3. Treat Vendors as Teammates
Define expectations upfront. Regular check-ins keep vendor coordination smooth and keep decisions moving forward quickly. You’ll accelerate timelines and reduce stress substantially.

Cater Like a Pro: Whether you are preparing for a big event or you want to impress your guests with a mouthwatering buffet, the Gas One disposable chafing dish buffet set has everything you need to display and keep the food at the perfect temperature, keeping it fresh and full of flavor!
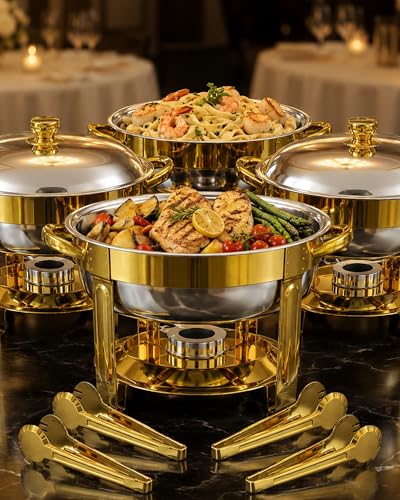
![ROVSUN Chafing Dishes for Buffet 8 Pack, 9QT Chafing Dishes [Elegant Gold & Silver] with Rolled-Edge Design, Catering Chafer Warmer Set with Folding Frame for Party Wedding Banquet](https://m.media-amazon.com/images/I/41KatuZEWYL._SL500_.jpg)
【Keeps Your Food Hot and Fresh All Day】Say goodbye to cold meals! This chafing dish buffet set keep your food hot and fresh for hours, ensuring guests can enjoy every bite at the perfect temperature, even during long gatherings or celebrations.Ideal for parties, banquets, weddings, and other indoor and outdoor catering events;
![ROVSUN Chafing Dishes for Buffet 6 Pack, 9QT Chafing Dishes [Elegant Gold & Silver] with Rolled-Edge Design, Catering Chafer Warmer Set with Folding Frame for Party Wedding Banquet](https://m.media-amazon.com/images/I/41mnaabxw7L._SL500_.jpg)
【Keeps Your Food Hot and Fresh All Day】Say goodbye to cold meals! This chafing dish buffet set keep your food hot and fresh for hours, ensuring guests can enjoy every bite at the perfect temperature, even during long gatherings or celebrations.Ideal for parties, banquets, weddings, and other indoor and outdoor catering events;