
In 2026, you’ll spend $200–$500 for replacing an existing ceiling fan, but new installations jump to $800 or more.
Your actual cost depends on several factors. Location matters—bigger cities charge higher rates.
Ceiling height, wiring needs, and electrical box upgrades significantly impact your bill.
If you’re installing multiple fans at once, you’ll save money through bundled pricing.
Understanding these cost drivers helps you budget accurately for your project.
Average Ceiling Fan Installation Cost in 2026

How much will you actually spend to get a ceiling fan up and running? Basic ceiling fan installation costs typically range from $50 to $150 for the fan itself, plus installation labor rates around $44 per hour. Your total ceiling fan installation costs depend on several factors. Ceiling height matters—higher ceilings mean more work. If you’ve got vaulted ceilings, expect to pay extra. Wiring or box requirements can bump up expenses significantly. Some folks need new wiring installed, which takes longer. Here’s what to know: straight replacements in Long Beach usually skip permit considerations entirely. However, new circuits might require permits your electrician handles. Installing multiple fans together? You’ll save money per fan since labor spreads across the project.
Basic Replacement vs. New Installation: Cost Differences
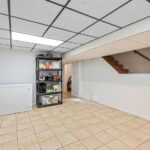
When you’re replacing an existing ceiling fan, you’ll likely spend less money than you would installing one from scratch. Here’s why: your wiring is in place and a fan-rated box is already there. That means installation focuses mainly on mounting and testing the new unit. Basic replacement costs run lower overall.
New installation is different. You’re running fresh wiring, installing a fan-rated box, and possibly adding wall switches. These additions require extra materials and labor time, pushing your ceiling fan installation cost significantly higher.
Think of it this way. Basic replacement is like swapping out old for new. New installation builds everything from scratch. Your installer concentrates effort where it matters most—getting your fan working safely and reliably in your space.
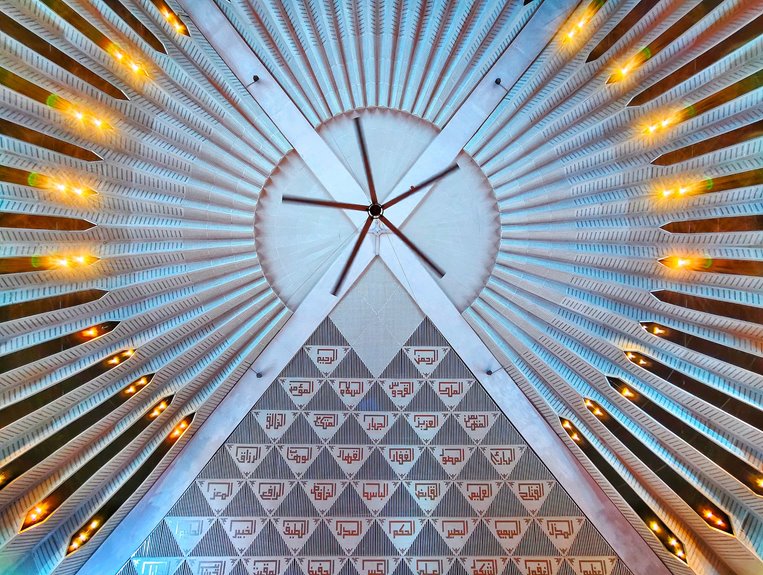
Vaulted and High Ceilings: Why They Cost More

Installing a ceiling fan in vaulted or high ceilings isn’t like working with your standard 8–10 ft room. Here’s why these projects cost more.
First, special ladders or scaffolding becomes necessary for safety when reaching 12 feet or higher. That’s equipment rental you wouldn’t need otherwise. Next, vaulted ceilings demand extra mounting hardware and downrod extensions to angle correctly. These parts add up quickly.
Labor time increases substantially too. Installers navigate tricky wiring runs through angled spaces, which takes patience and skill. Bracing the fan properly in these structures requires careful planning.
Consider it this way: you’re paying for specialized equipment, additional materials, and expertise. Vaulted and high ceiling installations rank among the priciest ceiling fan jobs available.
Electrical Wiring and Box Upgrades: What Adds to Your Bill

Why does the electrical setup matter so much? Your home’s existing wiring and ceiling box directly impact ceiling fan installation costs. I’ll break down what influences your final bill so you’re not caught off guard.
| Upgrade Type | Why It’s Needed | Cost Impact |
|---|---|---|
| Fan-rated ceiling box | Safely supports fan weight | Small but necessary |
| New wiring circuits | Handles increased electrical load | Significant increase |
| Permit fees | Local code compliance | $50–$200+ |
| Box replacement labor | Removes standard boxes | Added time and materials |
| Wire runs | Extends power to new location | Major cost driver |
Faulty wiring or non-fan-rated boxes raise your labor costs considerably. Permits may be required depending on your locale. I recommend having an electrician assess your setup first—it saves money long-term.
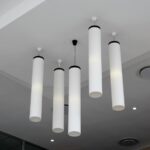
Smart Fans and Specialty Features: From Basic to Advanced

How much extra will you spend upgrading to a smart ceiling fan? You’re looking at $350–$600+ for the unit itself, plus installation costs. Smart fans demand extra wiring and setup work that basic pull-chain models don’t require. You’ll need a professional electrician to handle the complex wiring safely and meet building codes. They’ll also help with app configuration and home automation integration. The good news? ENERGY STAR smart fans can reduce your operating costs, especially if your utility offers time-of-use plans. Popular Long Beach brands like Hunter, Hampton Bay, and Casablanca offer various smart features at different price points. Skip the DIY approach with electrical work—hiring professionals upfront prevents costly compliance issues later.
Outdoor and Damp-Rated Fans: Premium Pricing for Weather Protection

If you’re installing a ceiling fan outdoors or in a damp location like a bathroom, you’ll notice the price tag jumps considerably compared to indoor fans. Here’s why: outdoor and damp-rated fans need special weatherproofing, moisture-resistant materials, and sealed junction boxes that protect against rain and humidity. These extra safety requirements mean you’re paying more for both the specialized fan itself and the expert labor needed to install it properly.
Weather-Resistant Installation Requirements
When installing a ceiling fan outside or in a damp bathroom, you’re dealing with a different setup than an indoor installation. Outdoor weatherproofing affects your costs and timeline. You’ll need weatherproof housing specifically designed to handle moisture exposure. These specialized components protect against rust and electrical damage. Your junction boxes must be sealed units rated for wet locations. Installation labor increases because proper sealing requires extra time and skill. Contractors need to apply protective hardware and weatherproof sealants carefully. They’re protecting your fan against rain, humidity, and temperature swings. Skip these steps at your peril—cutting corners invites costly repairs later. The damp-rated equipment itself costs more upfront, but it’s worth the investment for safety and longevity.
Damp Location Cost Premiums
Why’s that damp-rated fan sitting in your cart costing more? I’ll break it down for you. Damp location premiums exist because outdoor fans need serious protection. You’re paying extra for weatherproofing materials and corrosion-resistant components that standard fans don’t have.
| Installation Type | Cost Level | Key Factors |
|---|---|---|
| Indoor standard | Baseline | Minimal sealing needed |
| Covered patio | Moderate | Some moisture protection |
| Exposed outdoor | High | Full weatherproofing required |
| Damp-location rated | Premium | Corrosion-resistant materials |
| Energy Star outdoor | Highest | Durability plus efficiency |
The cost factors really matter here. Sealed junction boxes, weatherproof wiring, and protective coatings add up quickly. A covered patio stays closer to indoor pricing. But exposed locations? They’ll spike your quote noticeably. Energy Star weatherproof options cost more upfront but last longer in harsh conditions. That premium protects your investment.
Long Beach Permits and Installation Costs: When Required

Does your ceiling fan installation need a permit in Long Beach? A permit is typically required when you’re adding new wiring or circuits to your home. However, if you’re simply replacing an existing fan in the same spot, you’ll likely skip the permit process entirely. This distinction matters because permits affect your installation cost and timeline. Your electrician handles all the permit paperwork if needed. For outdoor weatherproof installations, permits are important since they verify your electrical work meets safety codes. Covered patios usually follow standard indoor pricing, but exposed outdoor locations require extra weatherproofing materials. These inspections and permits can increase labor costs slightly, particularly for complex multi-fan projects. Understanding these requirements upfront helps you budget accurately.
Installing Multiple Fans: Why Bundling Saves Money
When you install multiple ceiling fans at once, you’ll see why the total cost drops markedly per fan. Installers combine their labor across all locations in your home, which cuts down on travel time, setup fees, and repeated trips—saving you real money on the overall project. You’ll also qualify for multi-fan discounts from providers, and if your electrical boxes and wiring are already in place, each additional fan requires less incremental work than installing just one.
Labor Cost Reduction Strategy
Installing multiple ceiling fans during one service visit costs substantially less per fan than scheduling separate appointments. When I bundle installations together, I’m maximizing service call efficiency by combining labor and equipment use across all fans.
Consider the practical benefits. Shared wiring runs and mounting brackets mean I’m not repeating setup tasks repeatedly. This labor savings approach qualifies you for multi-fan discounts that providers gladly offer bundled installation customers. The technician arrives once, stages equipment once, and handles all fans in a single trip.
Three fans installed together? You’ll pay substantially less than three separate visits would cost. Shared testing procedures and consolidated safety checks maintain consistent quality while reducing your overall expenses. That’s practical planning.
Per-Fan Pricing Advantages
Per-Fan Pricing Advantages
The cost savings become clear when you examine what each fan actually costs to install. Here’s why bundling makes financial sense:
- Labor amortization spreads costs – Technicians complete multiple fans in one service call instead of three separate visits.
- Per-fan discount increases – Bundled pricing from providers reduces your overall expense significantly compared to individual installations.
- Setup efficiency compounds – If walls or switches are already wired, your multi-fan installation skips repetitive work, lowering total labor.
Your upfront purchase price stays the same, but here’s the key difference: the installation labor gets split across all fans you’re installing together. Think of it like carpooling for your electrician. You’re joining others in getting maximum value from one trip, which means everyone saves money.
Multi-Fan Project Efficiency
Because you’re consolidating work into one visit, bundling multiple ceiling fan installations dramatically cuts your labor costs. I’d recommend installing three or more fans together for the best savings.
Here’s why multi-fan efficiency works. Your crew handles shared setup once. They assess the electrical box together, check all wiring simultaneously, and prepare mounting spots without repeating steps. That’s smart resource use.
Bundled pricing makes a real difference too. Providers like FanDiego offer discounts when you install multiple fans at once. You’ll also get a 30-day labor warranty covering all units.
Think of it this way: one visit means consolidated materials, fewer mobilization fees, and reduced travel costs. Your installation cost drops substantially compared to scheduling three separate appointments. That’s efficiency in action.
Your Old Ceiling Box Might Need Replacing (And Why)

When you’re planning a ceiling fan installation, here’s something important: your existing ceiling box might not be up to the job. Many older homes have boxes designed for light fixtures only, not fans. Here’s what you should know:
- Non-fan-rated boxes can’t safely handle a fan’s weight and vibration during operation
- Upgrading to a fan-rated box is necessary for preventing costly failures down the road
- Box replacement adds both parts and labor costs to your overall installation cost
Your ceiling box directly impacts install time and safety. A sturdy, fan-rated box reduces failure risk substantially. If you’re in an older Long Beach home, your box might need reinforcement or complete replacement. This safety upgrade protects your investment and keeps everyone below protected. Don’t skip this step.
DIY vs. Professional Installation: The True Cost of Mistakes

Why do so many DIY ceiling fan installations end up costing more than hiring a pro? Skipping professional installation often backfires. When you tackle wiring yourself, you might miss safety issues that require expensive fixes later. Non-fan-rated boxes and outdated wiring create serious hazards. Professional installers handle permitting, grounding, and code compliance—details that protect your home. They verify your installation meets current electrical codes. DIY mistakes can spark costly repairs or fire risks. Professional installation costs more upfront, but you’re paying for reliability and peace of mind. A simple replacement in the same location costs less than new wiring. However, complex jobs with new circuits demand professional expertise. Consider this: would you rather invest now in proper installation or risk safety and finances later?
Smart Fans and ENERGY STAR Models: Are They Worth the Upfront Cost?

Smart and ENERGY STAR ceiling fans offer genuine savings, but you’ll need to weigh upfront costs carefully. These models reduce your energy bills over time, especially with time-of-use electricity plans. However, installation costs in Long Beach can be substantial.
- Base fan prices range from $350 to $600+ for smart models
- Labor and wiring expenses increase significantly due to additional setup needs
- Popular brands like Hunter, Hampton Bay, and Casablanca offer smart options
Smart fans require extra wiring and configuration work. This pushes your total installation cost higher than standard fans. You’re investing in convenience and savings simultaneously. The upfront expense typically pays for itself within several years through reduced electricity usage. Consider your long-term energy goals when deciding.
Service Guarantees and Warranty Protection: What Professionals Provide
Once you’ve picked your smart fan and budgeted for installation, you’ll want to know what happens if something goes wrong. When you hire professionals like Karmic Electrical, you’re getting more than just labor. Your service guarantees and warranty protection cover the scope of work outlined in your quote.
| Coverage Type | What’s Included |
|---|---|
| Professional Installation | Mounting, wiring, assembly, testing |
| Workmanship Warranty | Labor defects within service period |
| Parts Coverage | Fan components and materials used |
| Safety Upgrades | Non-fan-rated box replacements |
| Follow-up Support | Post-installation troubleshooting |
That $249 first-hour flat-rate means you’re paying for expertise and accountability. Professionals document everything they do, so you know exactly what’s covered. If issues pop up, you’ve got recourse. This protection matters, especially with complex installations requiring permits. You’re investing in peace of mind alongside your ceiling fan installation.
Ceiling Fan Installation Costs Across California: Long Beach Breakdown
How much you’ll actually pay for ceiling fan installation in Long Beach depends on several factors that go beyond just the fan’s price tag.
- Permit requirements apply only when adding new wiring or circuits, not for simple replacements in existing locations
- Electrical labor rates average around $44 per hour, with total ceiling fan installation cost varying based on project complexity
- Multiple fans installed together reduce per-fan labor costs through shared travel time and efficiency
Your ceiling height significantly impacts pricing. Standard 8–10 ft ceilings cost less than vaulted or higher installations requiring specialized equipment. Damp/wet-rated outdoor fans for covered patios or exposed areas add weatherproofing expenses. Installing three fans simultaneously? You’ll save money compared to scheduling separate visits. Understanding these Long Beach specifics helps you budget accurately for your project.
Ready to Get Your Ceiling Fans Installed?

Now that you understand pricing factors, it’s time to schedule your installation. I’d recommend calling local electricians or checking TaskRabbit to compare quotes based on your specific setup—existing wiring, ceiling height, and how many fans you need. Once you’ve found a provider that fits your budget, book your appointment and confirm they’ll handle any permits or safety inspections your area requires.
Next Steps For Installation
Ready to move forward? Here’s what you should know before scheduling your ceiling fan installation.
- Assess your current setup – Check if you’re replacing an existing fan in the same location, which keeps costs down and often skips permit requirements.
- Determine wiring needs – Ask yourself whether new wiring or circuits are necessary, as these additions increase labor costs and require permits in Long Beach.
- Consider fan specifications – If you’re installing outdoor or damp-rated fans, you’ll need weatherproofing equipment, which raises installation prices.
Getting multiple fans installed together reduces per-fan labor costs. Complex setups like vaulted ceilings require professional expertise and higher labor time. Understanding these factors helps you budget accurately and plan your next steps with confidence.
Scheduling Your Service Appointment
Once you’ve mapped out your fan needs and wiring requirements, it’s time to book your installation appointment. I’ll walk you through the scheduling process and what to expect cost-wise.
When you contact TaskRabbit or similar services, you’re looking at average labor rates around $44 hourly for electrical help. Your ceiling fan installation cost depends on several factors worth considering upfront.
| Factor | Impact on Cost |
|---|---|
| Location | Larger cities charge more |
| New wiring needed | Increases appointment length |
| Multiple fans | Single visit saves money |
| Outdoor installation | Requires weatherproofing fees |
Booking multiple fans together reduces per-fan labor costs significantly. If your project involves new wiring, expect higher expenses and longer appointment times. Local pricing varies considerably, so getting quotes from your specific area gives you accurate numbers before committing.