
1) Material Choice – Wood costs less upfront but needs maintenance; vinyl costs more initially but lasts longer.
2) Perimeter – Longer yards mean more materials and labor.
3) Terrain – Slopes, rocks, and roots add complexity and expense.
4) Local Permits – Seattle requires permits for fences over 6 feet; skip them and face fines.
5) Labor – Professional installation costs half your budget or more.
6) Design – Decorative elements like lattice tops increase material and labor costs.
7) Gates and Add-Ons – Each opening significantly increases your total cost. Understanding these factors reveals where your money actually goes.
Material Choice: What Each Option Costs and Lasts

When you’re planning your backyard fence, the material you choose will shape both your wallet and your maintenance schedule.
1. Wood Fences
Wood offers natural beauty and decent durability. Cedar resists pests better than pine but costs more upfront. You’ll need regular maintenance to keep wood looking good.
2. Chain Link Fences
Chain link is the most budget-friendly option per foot. Galvanized steel wires create a sturdy barrier, though privacy is limited. Maintenance stays minimal with this material.
3. Vinyl Fences
Vinyl has higher initial material costs than wood or chain link. However, the fence lifespan extends considerably, and you’ll spend far less on maintenance over time. This makes vinyl a smart choice for long-term savings.
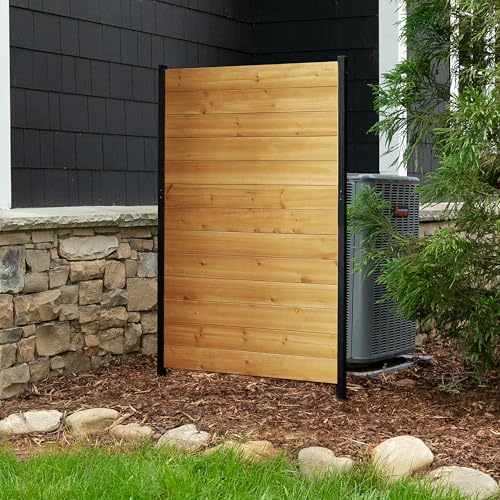
STYLISH NATURAL WOOD: This FSC certified wood screen is made with real wood meaning no two boards have the same grain color, finish, or wood knots differing it from vinyl outdoor privacy fence screen panels.

STYLISH NATURAL WOOD: This FSC certified wood screen is made with real wood meaning no two boards have the same grain color, finish, or wood knots differing it from vinyl outdoor privacy fence screen panels.

STYLISH NATURAL WOOD: This FSC certified wood screen is made with real wood meaning no two boards have the same grain color, finish, or wood knots differing it from vinyl outdoor privacy fence screen panels.
Measure Your Yard: Why Perimeter Drives Total Cost

I’ll measure your yard’s perimeter because that’s the foundation of your fence cost; the longer the distance you’re fencing, the more materials and labor you’ll need. You’ll calculate linear footage by measuring each side of your yard and adding them together, which gives you the exact number of feet you’re installing. This single measurement drives your budget more than almost anything else, so getting it right upfront saves you money and prevents surprise costs later.

PREMIUM 4x4 VINYL POST SLEEVE: Weatherables Post Sleeves are the simple solution to outdoor deck post upgrades and refurbishments, offering a lasting yet low-maintenance fix for any standard deck mount, post, and railing.

Package includes: you will receive 6 pieces of gate pull strings, sufficient quantity which are available for your home doors and can be replaced at any time, easy for you to open and close your door
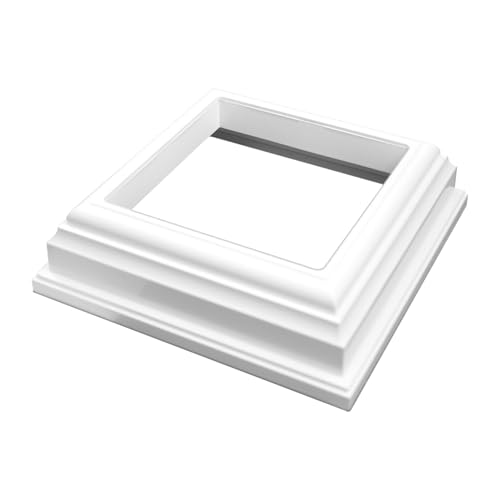
PREMIUM: Upgrade your outdoor space or outdoor patio with Weatherables' New England post skirt! Stylish and durable, our white post skirt adds a decorative and finished look to your deck, fence post, porch posts or mailbox post.
Linear Footage Calculation Methods
How does your yard’s perimeter determine your fence budget? Understanding this essential first step helps you plan accurately. When you measure your property’s outer edges, you’re finding linear footage; the total distance around your yard. This number directly affects your material costs and labor expenses for fence installation.
To calculate what you’ll need:
- Measure each side of your yard with a tape measure, recording distances in feet
- Add all measurements together to find your total perimeter
- Account for terrain factors like slopes or obstacles that might increase per-foot cost
Your linear footage becomes the foundation for estimating expenses. Longer perimeters require more posts, panels, and installation time. Understanding this calculation helps you budget accurately and make informed financial decisions about your fencing project.
Perimeter Impact On Budget
Your yard’s perimeter, the distance around your entire property, directly determines how much you’ll spend on fencing.
1. Fence Length Drives Material Costs
Longer perimeters require more panels and posts. Chain link runs $15–$30 per foot, while vinyl costs $35–$60 or more. Every additional foot multiplies your material expenses substantially.
2. Labor Costs Scale With Distance
Installation time increases with fence length. More posts mean more digging, setting, and securing. You’re paying labor for every linear foot your contractor covers.
3. Terrain Challenges Add Expenses
Sloped or uneven ground along your perimeter requires specialized panels and extra adjustments. Challenging terrain demands more skilled labor, raising your total budget.
4. Removal Expenses Matter
An existing fence spanning your full perimeter must be removed first. This adds substantial labor costs before new installation begins.
Assess Your Terrain: Hidden Costs of Slopes and Obstacles

Before you get quotes for your fence, take a close look at your yard’s natural features.
Your terrain surface impacts your final costs. Hidden obstacles add up quickly during installation.
Common Terrain Challenges:
- Sloped yards require stepped or racked panels, increasing material complexity and labor time substantially
- Rocks and roots complicate digging post holes, demanding extra effort and specialized equipment
- Obstructions along the fence line raise post and panel quantities, stretching your budget
Grading a slope demands extra labor. Leveling ground and ensuring stable posts takes time. Professional handling prevents costly structural issues later. When terrain challenges exist, you’ll want experienced installers managing the work. They reduce risks and future maintenance headaches. Assessing your yard upfront helps you budget accurately and avoid surprise expenses down the road.

Standard Size: you will get 1 piece of Chain Link Fence Post Floor Flange, tube diameter is 2-3/4 inches, which comes with 2 screws, fits posts of 2 1/2" Posts (2 3/8" OD), the base measures approximately 6 1/2" x 6 1/2", 4 1/4" in height, and needs to be fixed with four 3/4" screws (not included)
【Product Size】Chain Link Fence Brace Band for 2-3/8" Outside Diameter Pipe or Posts. Please measure the OUTER DIAMETER of your pipe before purchasing to ensure a proper fit

🛠️Made from 14-gauge galvanized steel, these chain link fence parts are far stronger than common aluminum versions, ensuring maximum durability. The rust-resistant coating protects against corrosion, making them perfect for outdoor use in gardens, farms, and dog kennels.
Check Local Rules: Seattle’s Permit Requirements and Fines

Check Local Rules: Seattle’s Permit Requirements and Fines
Once you’ve sorted out your yard’s terrain challenges, it’s time to check what Seattle requires legally.
1. Understand Seattle’s Height Rules
Permits are typically required for fences over 6 feet tall in Seattle. Failing to obtain them can result in fines or having to redo your entire project. Visit Seattle.gov for official guidance on permit details and compliance for your fencing project.
2. Check Neighborhood Regulations
Your neighborhood rules can also govern fence height, style, or color. These regulations influence permitting needs and costs, so review your specific district’s requirements before building.
3. Mark Utility Lines First
Utility line marking is required before post installation. This step avoids hazards and prevents permit-related delays that could increase your expenses.
4. Plan for Add-Ons
Privacy slats or decorative post caps may require additional approvals or permits in some districts.

【Upgraded Garden Fence】 Classic arch shape design garden fencing single piece size height is 22 inches(5'' stakes in soil), length is 12.6 inches, and the fence gap is 1.9 inches, total 10 pieces of fence, overall length about 11 ft. Equipped with 11 Pcs height of 17 inches metal stakes. More convenient installation. This fence will be the best choice for your beautiful garden, yard & patio!


【Upgraded Dig Defense Gap】Upgraded yard fence gap is reduced to 1.26 inches, which can more effectively prevent pets from breaking free from the gap to escape or other small animals from entering and damaging your garden and yard. You will receive 10 pcs garden fencing, snaps and zip ties, total length about 10.83 ft
Labor Costs: DIY Savings vs. Professional Quality

Labor costs often represent half or more of what you’ll spend on a fence project. You can save money by installing it yourself, but you’ll need specialized tools and skills to avoid structural problems.
Consider these factors affecting labor expenses:
- Permits and inspections add time when fences exceed 6 feet, requiring approvals before work begins
- Terrain challenges such as slopes, rocks, or roots slow digging and may require extra posts or special panels
- Fence removal costs extra unless you handle demolition yourself, which significantly extends your project timeline
Professionals bring equipment and expertise that deliver quality results. They navigate permits smoothly and handle difficult terrain efficiently. While DIY saves money upfront, professional quality protects your investment over time.

PET & CHILD SAFE: Create a safe outdoor play area for fur babies and children. Rest assured that this fence will create a sturdy barrier to protect your family.

DIMENSIONS: Each panel measures 32” H x 48” W

✅ No-Dig Installation-- Installs easily without digging—just push the stakes into the ground. A simple and clean setup that saves time and keeps your yard intact.
Design and Height: How Style Choices Affect Your Final Price

Why does one fence cost thousands more than another? Your fence style and height drive most expenses. Per-foot costs vary dramatically based on design choices. Simple chain-link runs cheaper than ornate wood or vinyl with decorative features.
| Fence Type | Height | Typical Cost Range |
|---|---|---|
| Chain-link | 4 feet | $8–15/foot |
| Wood picket | 4 feet | $15–30/foot |
| Privacy fence | 6 feet | $20–40/foot |
A privacy fence costs more because it requires extra materials and posts. Decorative toppers and lattice additions increase your budget further. Gates add another layer of expense: expect $300 to $1,000, with automatic models sometimes exceeding $2,000. Evaluate what you truly need versus what serves a purely decorative purpose.

1 SCREEN PURCHASE: You will receive preassembled materials to construct 1 cedar wood outdoor privacy screen in a charcoal finish with your purchase

STYLISH NATURAL WOOD: This FSC certified wood screen is made with real wood meaning no two boards have the same grain color, finish, or wood knots differing it from vinyl outdoor privacy fence screen panels.

【Wide Range of Applications】If you are looking to create a dark bamboo reed fence or any natural reed fence, like a rustic fence, bamboo privacy fence or dark brown fencing, our reed fence simply take it out for instant fencing, reed screening or shading
Gates and Add-Ons: Where Costs Really Climb

When you’re budgeting for your fence, gates and add-ons can significantly increase your total costs. I’ll show you where expenses climb fastest and how to make smart choices about which features matter for your property. Understanding these costs upfront helps you plan a realistic budget and avoid surprises during installation.
PREMIUM: Upgrade your outdoor space or outdoor patio with Weatherables' New England post skirt! Stylish and durable, our white post skirt adds a decorative and finished look to your deck, fence post, porch posts or mailbox post.

Package Includes: the package comes with 8 pieces of vinyl picket fence caps, sufficient quantity can meet your using needs, please make sure about the quantity for your installation of the fence before purchase

Package Includes: each package includes 8 brackets for vinyl fencing and 80 screws, making it easy and convenient to renovate or repair your fence without having to purchase additional hardware
Gate Installation Expenses
Gates and add-ons represent where your fence budget can really climb. Understanding what drives these costs helps you plan wisely.
1. Gate Type Matters Most
Standard walk-through gates run $300 to $1,000, while automatic gates exceed $2,000. Vehicle gates cost significantly more due to their larger size, heavier gate hardware, and demanding installation work.
2. Extra Features Add Up
Decorative post caps, lattice tops, and privacy slats each charge per-post or per-foot fees that accumulate quickly.
3. Technology Increases Expenses
Electric lighting or automatic gate systems require wiring, controllers, and safety devices, all of which increase your total investment.
Gate placement directly influences material and labor costs. More openings demand additional gate hardware and precise alignment work, making your gate installation budget expand with each opening you add.
Premium Add-On Features
Premium Add-On Features
Once you’ve decided on your gate, you’ll face another set of choices that can considerably impact your final bill.
1. Privacy Slats
Chain link fencing becomes more private with slat add-ons. They cost $5–15 per foot extra. You’re investing in both seclusion and improved aesthetics.
2. Decorative Post Caps
These finishing touches run $10–30 per cap. They enhance your property’s appearance while protecting posts from weather damage and extending your fence’s lifespan.
3. Decorative Designs
Lattice tops and custom patterns increase material and labor costs. They create distinctive focal points that boost property value by converting standard fencing into custom installations.
4. Lighting Features
Gate lighting or accent illumination requires additional materials and installation time. Strategic lighting improves security, safety, and your evening enjoyment of the outdoor space.